Cryptocurrencies have revolutionized the financial world, and Stellar Lumens (XLM) stands out as a key player in this rapidly evolving reality. Stellar Lumens is the native cryptocurrency of the Stellar network, a blockchain platform designed to facilitate fast, low-cost cross-border payments and financial transactions.
Stellar Lumens serves a vital role in this ecosystem. It acts as a bridge currency for transactions, ensuring quick conversions between different currencies.
So, why should you consider buying Stellar Lumens? XLM offers unique advantages and focuses on financial inclusion.
This article aims to guide you through buying Stellar Lumens step by step and provide valuable insights to ensure a smooth and informed investment experience.
How to Buy Stellar Lumens Easily
1. Choose a Reputable Cryptocurrency Exchange
The first step in buying Stellar Lumens is selecting a reliable cryptocurrency exchange. These exchanges provide a simple interface for buying and trading Stellar Lumens, even for beginners.
When choosing an exchange, consider:
- Security features: Does the platform have two-factor authentication and cold asset storage?
- Fees: Look into trading fees, withdrawal charges, and deposit costs.
- User interface: Is the platform easy to navigate for beginners?
2. Create and Verify Your Account
Once you’ve chosen an exchange, you need to sign up. The process usually involves:
- Fill in basic information: Provide your name, email address, and phone number.
- Verifying your identity: Most reputable platforms follow Know Your Customer (KYC) protocols. You’ll need to upload a government-issued ID and, in some cases, proof of address.
- Setting up security: Enable features like two-factor authentication (2FA) for extra account protection.
3. Fund Your Account
After setting up your account, the next step is to deposit funds. Most platforms allow multiple methods to fund your wallet:
- Bank transfer: Deposit money directly from your bank account.
- Credit or debit card: Use your card for instant deposits.
- Third-party apps like MoonPay: Buy Stellar Lumens directly and transfer them to your Stellar wallet.
Using fiat currencies like USD, EUR, or GBP is the most common way to fund your account. However, if you already own cryptocurrencies like Bitcoin (BTC) or Ethereum (ETH), you can transfer them to the exchange and trade them for Stellar Lumens.
4. Navigate to the Stellar Lumens Trading Pair
Once your account is funded, search for Stellar Lumens (XLM) in the exchange. You’ll typically find trading pairs like:
- XLM/USD (Stellar Lumens to US Dollars)
- XLM/EUR (Stellar Lumens to Euros)
- XLM/BTC (Stellar Lumens to Bitcoin)
This allows you to buy XLM using your chosen currency or asset.
5. Place Your Order
Now, it’s time to buy Stellar Lumens. Here’s how:
- Decide on the type of order
- Market order: Buy XLM instantly at the current market price.
- Limit order: Set a specific price you want to buy, and the order will execute when the price reaches that level.
- Input the amount: Specify how much XLM you want to purchase or the amount of fiat you wish to spend.
- Confirm the transaction: Review the details, including fees, and confirm your order.
After placing your order, you’ll see Stellar Lumens credited to your exchange wallet.
Advantages of Stellar Lumens
Stellar Lumens (XLM) has several compelling advantages that make it a valuable cryptocurrency to own:
1. Fast Transactions
Stellar’s blockchain processes transactions in just 3-5 seconds. This speed makes it an ideal platform for sending and receiving payments quickly, even across borders. Unlike traditional banking systems or blockchains like Bitcoin, Stellar’s transaction speed is a game-changer.
2. Low Fees
Stellar transactions cost an average of 0.00001 XLM per operation, a fraction of a cent. This ultra-low cost makes it highly efficient for micropayments, remittances, and high-frequency transactions. Businesses and individuals alike benefit from these negligible fees.
3. Scalability
Stellar’s infrastructure can handle thousands of transactions per second, making it highly scalable. This scalability ensures the network can support global adoption without slowing down or experiencing high fees, unlike other blockchains during peak usage.
How to Sell Litecoin in Nigeria
You can sell your Litecoin for instant cash. The best platform to do this in Nigeria is SnappyExchange. Here is how:
1. Create or Log In to Your SnappyExchange Account
To get started on SnappyExchange, you need to create a new account. If you already have an account, simply click ‘Log In,’ enter your email and password, and you’ll be taken to your account dashboard.
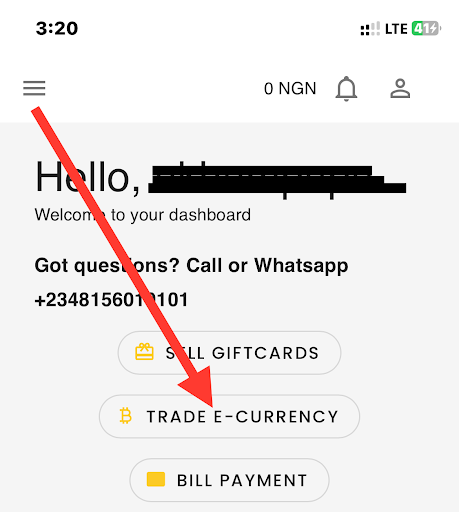
2. Go to the ‘Trade E-currency’ Section
After logging into your SnappyExchange account, click the ‘Trade E-currency’ section. This option is usually located in the main menu or on your dashboard. Click on it to open the trading interface.
3. Scroll Down to Litecoin or Search Litecoin in the Box
In the ‘Trade E-currency’ section, scroll through the list of cryptocurrencies to find Litecoin or use the search box to locate it quickly.
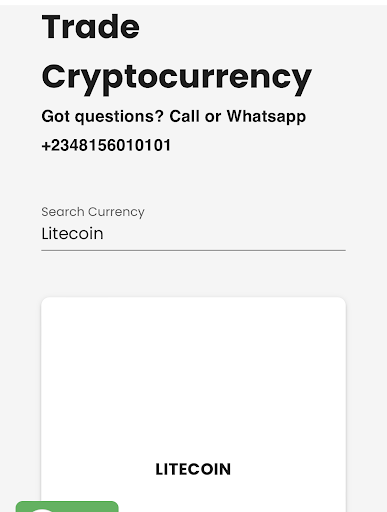
Typing “Litecoin” in the search box will help you find the trading options for Litecoin more easily. Click on Litecoin.
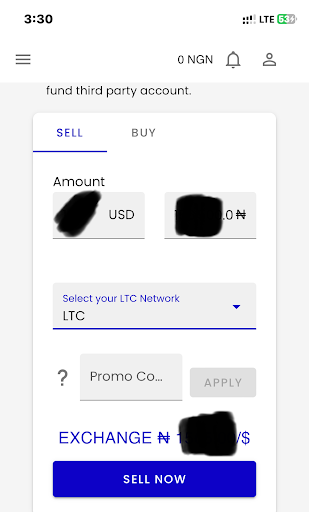
4. Fill in the Details and Click ‘Sell Now’
Enter the amount of Litecoin you want to sell and choose the correct LTC network. Double-check your details for accuracy, then click ‘Sell Now’ to begin the sale. This will start the transaction process and get your Litecoin ready for sale.
5. Transfer Litecoin to the Wallet Address Provided
To complete the sale, transfer your Litecoin from Trust Wallet to the wallet address provided by SnappyExchange.
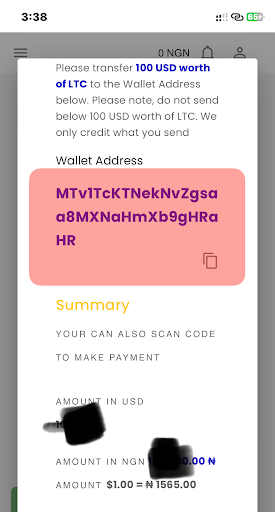
Open Trust Wallet, find your Litecoin balance, and select ‘Send.’ Enter the wallet address from SnappyExchange and the amount of Litecoin you want to transfer.
Confirm and authorize the transaction. Once processed, SnappyExchange will receive your Litecoin and continue with the sale.
6. Confirm All Transaction Details and Continue
Before finalizing the transaction, carefully check all the details, including the wallet address and the amount of Litecoin you’re sending.
Once you’re sure everything is correct, proceed with the transaction. This step ensures that your Litecoin is transferred accurately to SnappyExchange and that the sale goes smoothly.
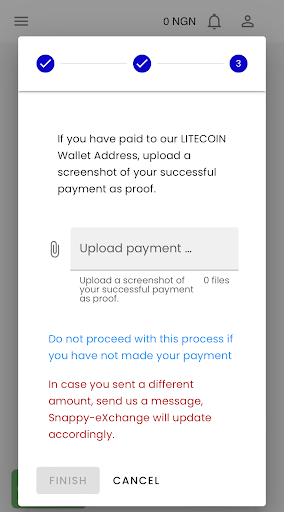
7. Upload Payment Screenshot and Click ‘Finish’
After transferring your Litecoin, upload a screenshot of the payment confirmation to SnappyExchange. Attach the screenshot of the payment, and click ‘Finish.’ This confirms your payment and finalizes the sale.
8. Wait for Transaction Approval
After submitting your payment screenshot, Wait for your transaction approval, which will take just a few minutes.
9. Get Credited
Once the transaction is approved, the funds will be deposited into your SnappyExchange wallet. You can view the credited amount by checking your wallet balance on the SnappyExchange dashboard.
Read Also: Difference Between Ripple and Stellar
Conclusion
Buying Stellar Lumens (XLM) is straightforward and rewarding, especially when you understand the steps involved.
Stellar Lumens stands out in cryptocurrency for its speed, low transaction costs, scalability, and commitment to financial inclusion.
Whether you’re a seasoned investor or just starting your cryptocurrency journey, XLM offers a unique opportunity to participate in a rapidly evolving global financial system.
As a digital asset designed for efficiency and accessibility, Stellar Lumens holds excellent potential for those looking to invest in the future of decentralized finance.